Metal-cpp: Offscreen Tiny Renderer
这一册实现一个纯 C++ 的离屏 renderer。你会在代码里创建 color attachment、depth attachment、render pipeline、vertex/index buffer、texture、sampler 和 camera uniform,然后把结果读回 CPU,写成 PPM、PNG 或 JPG 图片。
书里的所有结果图都来自同一个渲染程序。为了让光照差异更容易观察,本书使用两组测试资产:
assets/meshes/uv_sphere.obj+assets/textures/warm_metal.ppm:用于比较Albedo Only、Lambert、Blinn-Phong和PBR的结果。assets/meshes/uv_sphere.obj+assets/textures/rusty_metal_02_basecolor.png:用于验证下载的 PBR 贴图包如何接入当前 renderer。assets/meshes/stanford_bunny.obj+assets/textures/clay.ppm:用于检查复杂曲面上的明暗和高光。
跟着正文完成之后,你应该能够自己替换 OBJ 和材质图片文件,并生成对应的离屏渲染结果。
Overview
第一册已经建立了基本的 Metal 执行模型:CPU 创建资源和命令,GPU 执行 shader,然后把结果写回图片。第二册保留“输出图片”这个终点,把中间步骤换成 render pipeline:vertex shader 处理几何,fragment shader 计算材质和光照,render pass 把像素写进离屏 texture。

下面这段是当前阶段要执行的命令,不是写进源码文件的内容。先用它确认工程能配置、编译并运行。
cmake -S . -B build
cmake --build build --target MetalCppTinyRenderer

./build/MetalCppTinyRenderer/MetalCppTinyRenderer \
  assets/meshes/uv_sphere.obj \
  assets/textures/warm_metal.ppm \
  lambert \
  build/MetalCppTinyRenderer/lambert.png
Project Layout
先把工程拆成三个文件。后面的每一章都会往这三个文件里继续补内容:
下面这段不是要拷贝到某个源码文件里,而是当前 Book2 的最小目录分工说明。
main.cpp      # command line arguments and output path
Renderer.cpp  # mesh/texture loading, camera, offscreen render pass, image writeback
Shaders.metal # vertex shader and four fragment shader stages
main.cpp 负责命令行参数,Renderer.cpp 负责资源和 draw path,Shaders.metal 负责 vertex 和 fragment shader。
Device and Command Queue
先创建 MTL::Device 和 MTL::CommandQueue。这一步和第一册完全一样,后面所有 render pass 都通过这个 queue 提交。

MTL::Device 创建资源,MTL::CommandQueue 创建并提交 command buffer。打开 Renderer.cpp,在设备初始化阶段新增下面这段代码。这里是新增,不是替换之前的任何函数。
MTL::Device* device = MTL::CreateSystemDefaultDevice();
if (!device)
{
    std::cerr << "Metal is not available on this Mac.\n";
    return false;
}

MTL::CommandQueue* queue = device->newCommandQueue();
Offscreen Render Target
这一章开始创建离屏 color texture 和 depth texture。render pass 会把颜色写进 color attachment,把深度写进 depth attachment;一帧结束后,CPU 再把 color texture 读回并保存成图片文件。
继续修改 Renderer.cpp。先新增一个创建 color texture 的辅助代码段;它属于新的 texture 创建逻辑,可以直接加到资源创建相关函数旁边。
MTL::TextureDescriptor* descriptor = MTL::TextureDescriptor::alloc()->init();
descriptor->setTextureType(MTL::TextureType2D);
descriptor->setPixelFormat(MTL::PixelFormatBGRA8Unorm);
descriptor->setWidth(width);
descriptor->setHeight(height);
descriptor->setStorageMode(MTL::StorageModeManaged);
descriptor->setUsage(MTL::TextureUsageRenderTarget);
MTL::Texture* colorTexture = device->newTexture(descriptor);
然后在同一个文件里,继续在编码 draw call 之前新增 render pass descriptor。它依赖上面创建好的 colorTexture。
MTL::RenderPassDescriptor* pass = MTL::RenderPassDescriptor::renderPassDescriptor();
MTL::RenderPassColorAttachmentDescriptor* color = pass->colorAttachments()->object(0);
color->setTexture(colorTexture);
color->setLoadAction(MTL::LoadActionClear);
color->setStoreAction(MTL::StoreActionStore);
color->setClearColor(MTL::ClearColor(0.08, 0.22, 0.25, 1.0));
完成这一步后,程序已经具备完整的“render to texture -> read back -> write image”路径。
Mesh and Texture Input
接下来加入外部输入。这个 renderer 读取两种文件格式:
OBJ:读取v、vt、vn和fPPM / PNG / JPG:读取 base color 贴图;参考代码通过ImageIO解码常见图片格式
先回到 main.cpp。在命令行参数解析部分新增下面四行默认值,让程序可以从外部文件读取 mesh、texture、stage 和输出路径。
options.meshPath = argc > 1 ? argv[1] : "assets/meshes/uv_sphere.obj";
options.texturePath = argc > 2 ? argv[2] : "assets/textures/warm_metal.ppm";
options.stage = argc > 3 ? argv[3] : "lambert";
options.outputPath = argc > 4 ? argv[4] : "build/MetalCppTinyRenderer/lambert.png";
保持 draw path 不变,只替换 mesh 和 texture,后面就可以用同一套程序比较不同资产上的着色结果。
如果 OBJ 没有提供 vn,参考代码会根据三角形几何自动生成平滑法线;如果没有 vt,参考代码会给出一个基础 UV,方便继续观察光照结果。
Camera and Framing
有了外部 mesh 之后,需要先解决“镜头放在哪里”。这里根据 mesh bounds 估计相机位置,再计算观察矩阵和投影矩阵。
继续修改 Renderer.cpp。在准备 uniform 数据的地方新增 camera framing 相关代码;如果你已经有 mesh、width 和 height,就可以接上这一段。
Vec3 eye = fitCameraPosition(mesh);
Vec3 target = meshCenter(mesh);
Mat4 view = lookAt(eye, target, {0.0f, 1.0f, 0.0f});
Mat4 proj = perspective(45.0f, float(width) / float(height), 0.1f, 100.0f);
运行程序时,如果模型能完整落进画面,就说明 camera framing 已经工作正常。
Vertex Shader
第二册的 vertex shader 负责三件事:
- 把 object-space 顶点乘上
mvp,送进 rasterizer - 把 world position 往 fragment shader 传,给视线和高光公式用
- 把 normal 和 uv 继续往后传
打开 Shaders.metal。先新增顶点输入结构体 Vertex 和顶点输出结构体 VertexOut。这是新的类型定义,可以直接放在文件开头已有的 Uniforms 附近。
struct Vertex
{
    packed_float3 position;
    packed_float3 normal;
    float2 uv;
};

struct VertexOut
{
    float4 position [[position]];
    float3 worldPosition;
    float3 normal;
    float2 uv;
};
结构体准备好以后,继续在 Shaders.metal 中新增 vertex_main。如果文件里已经有旧的顶点函数,就用这一版替换;如果还没有,就直接新增。
vertex VertexOut vertex_main(uint vertexID [[vertex_id]],
                             device const Vertex* vertices [[buffer(0)]],
                             constant Uniforms& uniforms [[buffer(1)]])
{
    const Vertex vtx = vertices[vertexID];
    const float3 position = float3(vtx.position);
    const float3 normal = float3(vtx.normal);
    VertexOut out;
    out.position = uniforms.mvp * float4(position, 1.0);
    out.worldPosition = (uniforms.model * float4(position, 1.0)).xyz;
    out.normal = normalize((uniforms.model * float4(normal, 0.0)).xyz);
    out.uv = vtx.uv;
    return out;
}
Texture Sampling
贴图路径在这一章接入。fragment shader 先从 texture 里取出 albedo,后面的所有光照算法都在这个基础上继续计算。
先在 Renderer.cpp 里新增用于保存解码结果的数据结构。这个结构体是新的,可以直接放在 mesh / uniform 相关结构体后面。
struct TextureData
{
    uint32_t width = 0;
    uint32_t height = 0;
    std::vector<uint8_t> rgba;
};

struct MaterialTextures
{
    TextureData baseColor;
    TextureData roughness;
    TextureData metallic;
    TextureData normal;
    TextureData ao;
};
如果你还在只支持 PPM 的阶段,下一步先把最基础的 PPM 解码函数写出来。下面这段代码新增到 Renderer.cpp,通常放在资源加载辅助函数区域。
TextureData loadPPM(const std::filesystem::path& path)
{
    std::ifstream in(path);
    if (!in)
    {
        throw std::runtime_error("Could not open texture: " + path.string());
    }
    if (nextToken(in) != "P3")
    {
        throw std::runtime_error("Only ASCII P3 PPM textures are supported.");
    }

    TextureData texture;
    texture.width = static_cast<uint32_t>(std::stoul(nextToken(in)));
    texture.height = static_cast<uint32_t>(std::stoul(nextToken(in)));
    const int maxValue = std::stoi(nextToken(in));
    texture.rgba.resize(texture.width * texture.height * 4);

    for (uint32_t i = 0; i < texture.width * texture.height; ++i)
    {
        const int r = std::stoi(nextToken(in));
        const int g = std::stoi(nextToken(in));
        const int b = std::stoi(nextToken(in));
        texture.rgba[i * 4 + 0] = static_cast<uint8_t>(r * 255 / maxValue);
        texture.rgba[i * 4 + 1] = static_cast<uint8_t>(g * 255 / maxValue);
        texture.rgba[i * 4 + 2] = static_cast<uint8_t>(b * 255 / maxValue);
        texture.rgba[i * 4 + 3] = 255;
    }
    return texture;
}
再继续在 Renderer.cpp 中新增 PNG/JPG 的解码函数。这个函数是新增的,不替换 loadPPM();它和 loadPPM() 并列存在。
TextureData loadImageWithImageIO(const std::filesystem::path& path)
{
    CFStringRef pathString = CFStringCreateWithCString(kCFAllocatorDefault, path.string().c_str(), kCFStringEncodingUTF8);
    CFURLRef url = CFURLCreateWithFileSystemPath(kCFAllocatorDefault, pathString, kCFURLPOSIXPathStyle, false);
    CFRelease(pathString);

    CGImageSourceRef source = CGImageSourceCreateWithURL(url, nullptr);
    CFRelease(url);
    CGImageRef image = CGImageSourceCreateImageAtIndex(source, 0, nullptr);
    CFRelease(source);

    TextureData texture;
    texture.width = static_cast<uint32_t>(CGImageGetWidth(image));
    texture.height = static_cast<uint32_t>(CGImageGetHeight(image));
    texture.rgba.resize(static_cast<size_t>(texture.width) * texture.height * 4);

    CGColorSpaceRef colorSpace = CGColorSpaceCreateDeviceRGB();
    CGContextRef context = CGBitmapContextCreate(
        texture.rgba.data(),
        texture.width,
        texture.height,
        8,
        texture.width * 4,
        colorSpace,
        kCGImageAlphaPremultipliedLast | kCGBitmapByteOrder32Big);
    CGColorSpaceRelease(colorSpace);

    CGContextDrawImage(context, CGRectMake(0, 0, texture.width, texture.height), image);
    CGContextRelease(context);
    CGImageRelease(image);
    return texture;
}
先修改 Renderer.cpp 里的贴图读取函数,把原来只支持 PPM 的入口改成“按扩展名选择加载器”。这是替换旧函数调用,不是新增一个并行分支。
std::string extension = path.extension().string();
std::transform(extension.begin(), extension.end(), extension.begin(), [](unsigned char c) {
    return static_cast<char>(std::tolower(c));
});
if (extension == ".ppm")
{
    return loadPPM(path);
}
return loadImageWithImageIO(path);
如果你要继续支持一整组 PBR 贴图,再在 Renderer.cpp 中新增一个材质贴图收集函数。它先读取命令行传入的 base color,再尝试自动查找同目录的 roughness、metallic、normal 和 AO。
MaterialTextures loadMaterialTextures(const RenderOptions& options, const Uniforms& uniforms)
{
    MaterialTextures textures;
    textures.baseColor = loadTexture(options.texturePath);
    textures.roughness = makeSolidTexture(
        static_cast<uint8_t>(std::clamp(uniforms.roughness, 0.0f, 1.0f) * 255.0f),
        static_cast<uint8_t>(std::clamp(uniforms.roughness, 0.0f, 1.0f) * 255.0f),
        static_cast<uint8_t>(std::clamp(uniforms.roughness, 0.0f, 1.0f) * 255.0f));
    textures.metallic = makeSolidTexture(
        static_cast<uint8_t>(std::clamp(uniforms.metallic, 0.0f, 1.0f) * 255.0f),
        static_cast<uint8_t>(std::clamp(uniforms.metallic, 0.0f, 1.0f) * 255.0f),
        static_cast<uint8_t>(std::clamp(uniforms.metallic, 0.0f, 1.0f) * 255.0f));
    textures.normal = makeSolidTexture(128, 128, 255);
    textures.ao = makeSolidTexture(255, 255, 255);

    const std::array<std::pair<std::string, TextureData*>, 4> optionalMaps = {{
        {"_roughness", &textures.roughness},
        {"_metallic", &textures.metallic},
        {"_normal", &textures.normal},
        {"_ao", &textures.ao},
    }};

    for (const auto& [suffix, target] : optionalMaps)
    {
        const std::filesystem::path candidate = siblingTexturePath(options.texturePath, suffix);
        if (std::filesystem::exists(candidate))
        {
            *target = loadTexture(candidate);
        }
    }
    return textures;
}
然后继续在 Renderer.cpp 的 renderScene() 里,把旧的单张贴图读取替换成材质贴图组读取。这里是对原有 texture/sampler 初始化代码的修改。
MaterialTextures materialTextures = loadMaterialTextures(options, uniforms);
MTL::Texture* baseColorTexture = createTexture(device, materialTextures.baseColor);
MTL::Texture* roughnessTexture = createTexture(device, materialTextures.roughness);
MTL::Texture* metallicTexture = createTexture(device, materialTextures.metallic);
MTL::Texture* normalTexture = createTexture(device, materialTextures.normal);
MTL::Texture* aoTexture = createTexture(device, materialTextures.ao);
MTL::SamplerState* sampler = createSampler(device);
如果文件名以 _basecolor 结尾,参考代码还会自动查找同目录下的 _roughness、_metallic、_normal 和 _ao。这样命令行只需要传 base color 路径,就能把同一套 PBR 贴图包一起接进来。
Rendering Progression
下面开始按顺序提高渲染结果。四张球体图使用同一组 mesh、texture、camera 和 light。顶点数据、相机、draw call、render pass 都保持不变,变化集中在 fragment shader 如何解释这些输入。
- mesh:
assets/meshes/uv_sphere.obj - texture:
assets/textures/warm_metal.ppm - camera/light: 保持不变
你可以把这四个阶段理解成“在同一套 renderer 上逐步加信息”:
Albedo Only        = base color
Lambert Diffuse    = base color + normal + light
Blinn-Phong        = Lambert + view + highlight
Metallic-Roughness = base color + normal + roughness
                     metallic + AO + Fresnel/GGX
可以把这四个阶段理解成四个问题:
Albedo Only:纹理是否正确上传并映射到模型上。Lambert:表面朝向光源时应该亮多少。Blinn-Phong:观察方向改变时,高光应该如何变化。PBR:粗糙度、金属性和 AO 如何一起控制能量分配。
Algorithm 1: Albedo Only
第一步先只显示 base color。这个阶段用来检查 uv、sampler 和 texture upload 是否正确。
在 Shaders.metal 中新增一个新的 fragment 函数 fragment_albedo。这是第一版片元着色器,不需要修改其他 fragment 函数。
const float3 albedo = baseColor.sample(baseSampler, in.uv).rgb;
return float4(albedo, 1.0);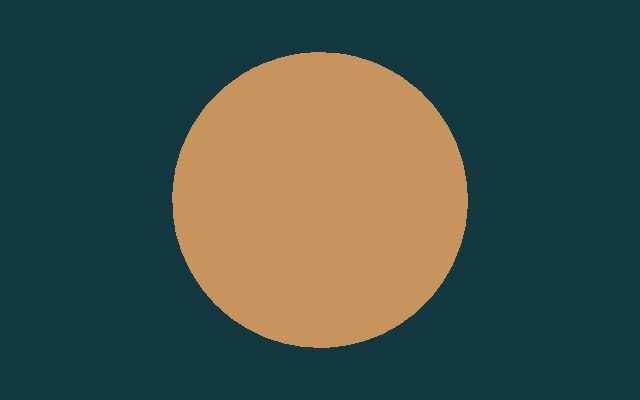
Algorithm 2: Lambert Diffuse
第二步加入漫反射。Lambert 模型只做一件事:比较表面法线 N 和光照方向 L 的夹角。夹角越小,点积 N · L 越大,表面就越亮。当前实现里,这个 N 可以来自几何法线,也可以来自 normal map 经过 TBN 变换后的世界空间法线。

max(N · L, 0)。它把“表面朝向哪里”直接转换成明暗变化。继续在 Shaders.metal 中新增第二个 fragment 函数 fragment_lambert。它是在 fragment_albedo 之外增加的新函数,不是修改 fragment_albedo。
const float3 N = sampleWorldNormal(in, normalMap, baseSampler);
const float3 L = normalize(uniforms.lightDirection.xyz);
const float diffuse = max(dot(N, L), 0.0);
const float sky = 0.35 + 0.65 * clamp(N.y * 0.5 + 0.5, 0.0, 1.0);
const float3 color = albedo * (0.10 + 0.65 * diffuse + 0.25 * sky);
return float4(color, 1.0);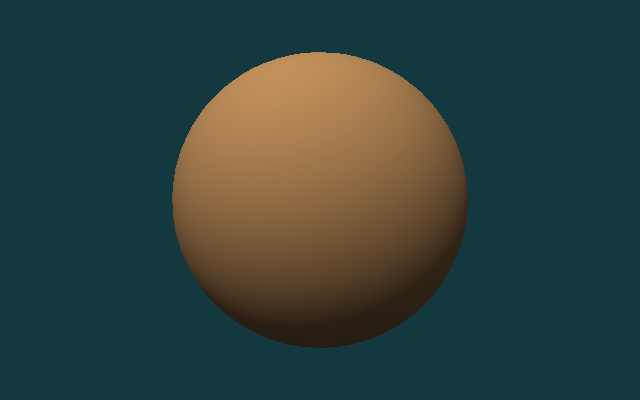
Algorithm 3: Blinn-Phong
第三步加入 Blinn-Phong 高光。除了法线 N 和光照方向 L,现在还需要观察方向 V。把 L 和 V 相加并归一化,可以得到 half vector H。当法线更接近 H 时,高光会更强。它不是物理正确模型,但非常适合让新手先看懂“视角变化为什么会影响亮点位置”。

这一步仍然修改 Shaders.metal,但方式和前两步不同:现在是新增一个新的 fragment_blinn_phong 函数,并且用行级标记显示它相对 Lambert 多出来的内容。
const float3 N = sampleWorldNormal(in, normalMap, baseSampler);
const float3 L = normalize(uniforms.lightDirection.xyz);
const float3 V = normalize(uniforms.cameraPosition.xyz - in.worldPosition);
const float3 H = normalize(L + V);
const float diffuse = max(dot(N, L), 0.0);
const float sky = 0.35 + 0.65 * clamp(N.y * 0.5 + 0.5, 0.0, 1.0);
const float specular = pow(max(dot(N, H), 0.0), 48.0);
const float3 color = albedo * (0.08 + 0.55 * diffuse + 0.22 * sky) + specular * 0.28;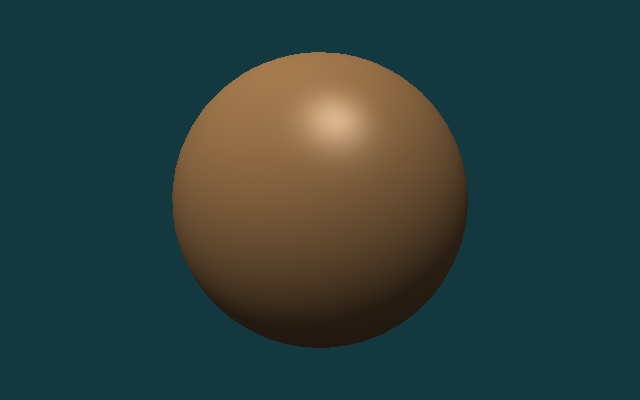
Algorithm 4: Metallic-Roughness PBR
第四步切换到 metallic-roughness PBR。PBR 仍然保留漫反射和镜面反射,但不再用一个简单的常数高光近似,而是把镜面反射拆成 Fresnel、visibility 和微表面分布三部分。metallic 决定能量更多留在 diffuse 还是 specular,roughness 决定高光是锐利还是宽散,ao 用来抑制环境项在缝隙和遮蔽区域里过亮。

最后在 Shaders.metal 中新增 fragment_pbr。如果你已经完成 fragment_lambert 和 fragment_blinn_phong,这一段可以作为第四个独立 fragment 函数继续加进去。下面保留的是当前实现里最关键的一段能量分配逻辑。
const float3 albedo = srgbToLinear(baseColor.sample(baseSampler, in.uv).rgb);
const float roughness = clamp(roughnessMap.sample(baseSampler, in.uv).r, 0.04, 1.0);
const float metallic = clamp(metallicMap.sample(baseSampler, in.uv).r, 0.0, 1.0);
const float ao = clamp(aoMap.sample(baseSampler, in.uv).r, 0.0, 1.0);
const float3 N = sampleWorldNormal(in, normalMap, baseSampler);
const float3 L = normalize(uniforms.lightDirection.xyz);
const float3 V = normalize(uniforms.cameraPosition.xyz - in.worldPosition);
const float3 H = normalize(L + V);
const float NdotL = max(dot(N, L), 0.0);
const float NdotV = max(dot(N, V), 0.0);
const float NdotH = max(dot(N, H), 0.0);
const float VdotH = max(dot(V, H), 0.0);
const float D = distributionGGX(NdotH, roughness);
const float G = geometrySchlickGGX(NdotV, roughness)
              * geometrySchlickGGX(NdotL, roughness);
const float3 F0 = mix(float3(0.04), albedo, metallic);
const float3 F = fresnelSchlick(VdotH, F0);
const float3 specular = (D * G * F) / max(4.0 * NdotV * NdotL, 1.0e-5);
const float3 kD = (1.0 - F) * (1.0 - metallic);
const float3 diffuse = kD * albedo / M_PI_F;
const float skyMix = clamp(N.y * 0.5 + 0.5, 0.0, 1.0);
const float3 ambientDiffuse = albedo * (0.18 + 0.22 * skyMix) * (1.0 - metallic) * ao;
float3 color = (diffuse + specular) * NdotL;
color += ambientDiffuse * uniforms.ambient;
color = tonemapACES(color);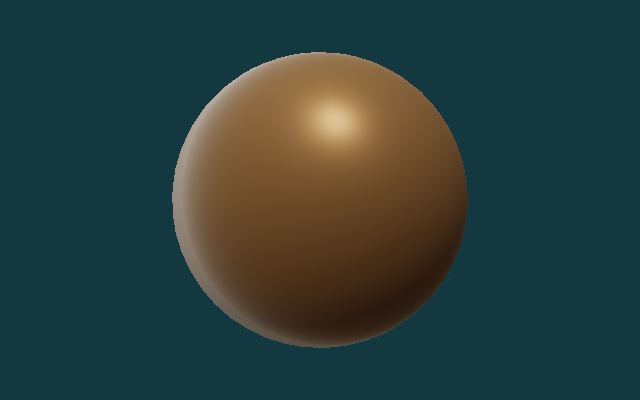
Downloaded PBR Material
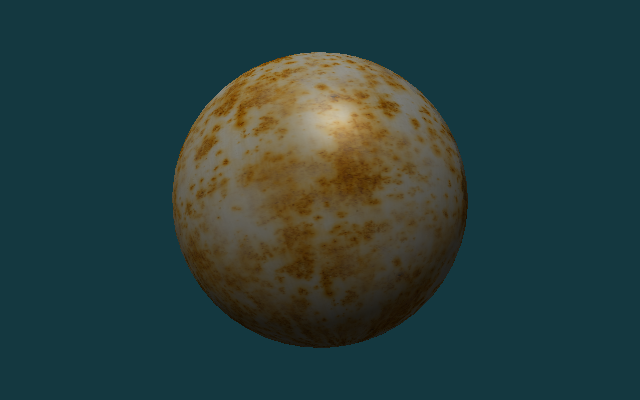
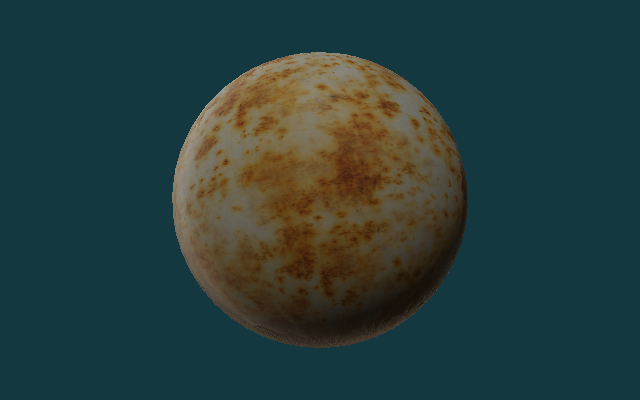
前面的四个阶段主要验证算法顺序。接下来换成一组真正的 PBR 贴图包,检查当前实现能不能读入 base color、roughness、metallic、normal 和 ambient occlusion,并把这些信息组合成最终结果。
本节使用的是 Poly Haven 的 Rusty Metal 02 1K 贴图。仓库里已经保存了拆分后的五张图:
rusty_metal_02_basecolor.pngrusty_metal_02_roughness.pngrusty_metal_02_metallic.pngrusty_metal_02_normal.pngrusty_metal_02_ao.png
这组材质很适合检查贴图加载路径,但当前仓库里的 metallic map 是全黑的。因此 PBR 结果更接近粗糙氧化表面,而不是强反射的裸金属。想要更真实的金属反射,需要换成 metallic 非零的材质,并进一步加入环境贴图或 IBL。
这一节不需要新增新的程序入口,只需要复用前面的 renderer。下面这段是运行命令,不是写进源码文件的内容。
./build/MetalCppTinyRenderer/MetalCppTinyRenderer \
  assets/meshes/uv_sphere.obj \
  assets/textures/rusty_metal_02_basecolor.png \
  lambert \
  images/results/MetalCppTinyRenderer/08-rusty-metal-lambert.png

./build/MetalCppTinyRenderer/MetalCppTinyRenderer \
  assets/meshes/uv_sphere.obj \
  assets/textures/rusty_metal_02_basecolor.png \
  blinn \
  images/results/MetalCppTinyRenderer/10-rusty-metal-blinn.png

./build/MetalCppTinyRenderer/MetalCppTinyRenderer \
  assets/meshes/uv_sphere.obj \
  assets/textures/rusty_metal_02_basecolor.png \
  pbr \
  images/results/MetalCppTinyRenderer/09-rusty-metal-pbr.png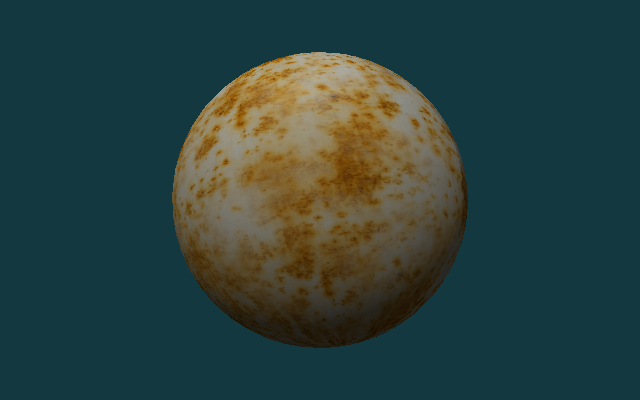
Test Assets
下面这三组资产会在本书后半部分反复使用:
uv_sphere.obj:用于比较不同光照算法在连续曲面上的结果。warm_metal.ppm:用于观察同一表面在不同着色模型下的颜色和高光。rusty_metal_02_*.png:用于验证从网上下载的 PBR 贴图包如何接入当前 renderer。stanford_bunny.obj:用于检查复杂曲面上的受光、背光和高光分布。
如果你要替换自己的资产,优先选带法线、uv 完整的 OBJ,以及尺寸不太大的 PPM、PNG 或 JPG 贴图。
Complex Geometry
球体适合比较算法顺序,复杂模型更适合检查 mesh loader、camera framing 和高光在真实曲面上的表现。这里使用 Stanford Bunny 做第二组验证。
这一节不需要改源码,只需要复用前面已经写好的程序,换一组命令行输入重新运行。
./build/MetalCppTinyRenderer/MetalCppTinyRenderer \
  assets/meshes/stanford_bunny.obj \
  assets/textures/clay.ppm \
  lambert \
  images/results/MetalCppTinyRenderer/05-bunny-lambert.png

./build/MetalCppTinyRenderer/MetalCppTinyRenderer \
  assets/meshes/stanford_bunny.obj \
  assets/textures/clay.ppm \
  blinn \
  images/results/MetalCppTinyRenderer/06-bunny-blinn-phong.png

Render Pass and Readback
渲染结束后,把 GPU 结果读回 CPU。由于 color texture 使用 StorageModeManaged,先做一次 blit synchronize,再调用 getBytes() 读取像素。
继续修改 Renderer.cpp。下面这段代码接在 draw call 结束之后、写文件之前;它是在原有渲染流程后面继续新增的读回步骤。
MTL::BlitCommandEncoder* blit = commandBuffer->blitCommandEncoder();
blit->synchronizeTexture(colorTexture, 0, 0);
blit->endEncoding();

commandBuffer->commit();
commandBuffer->waitUntilCompleted();

colorTexture->getBytes(pixels.data(),
                       width * 4,
                       MTL::Region::Make2D(0, 0, width, height),
                       0);
继续修改 Renderer.cpp 的输出部分,把原来固定写 PPM 的调用替换成按扩展名选择输出格式。下面这段是在旧的 writePPM(...) 调用位置做替换。
writeOutputImage(options.outputPath, pixels, options.width, options.height);参考代码现在会根据输出路径扩展名自动选择写法:.ppm 继续走原来的二进制 PPM,.png 和 .jpg 通过 ImageIO 编码。
CMake Changes
这一册的 target 只包含两个 C++ 源文件:
打开 CMakeLists.txt,在项目已有的 target 定义区域新增 Book2 的可执行文件:
add_executable(MetalCppTinyRenderer
    src/MetalCppTinyRenderer/main.cpp
    src/MetalCppTinyRenderer/Renderer.cpp)
引入 PNG/JPG 贴图读写之后,链接的 framework 不再只有 Metal 本身,还要补上 CoreGraphics 和 ImageIO。
继续修改同一个 CMakeLists.txt target,把 include path 和 framework 链接补齐:
target_include_directories(MetalCppTinyRenderer PRIVATE "${METAL_CPP_ROOT}")
target_link_libraries(MetalCppTinyRenderer PRIVATE ${METAL_FRAMEWORKS})
如果你是从只支持 PPM 的版本继续改,记得同时把 METAL_FRAMEWORKS 列表补成下面这样;这一步是修改已有框架列表,不是新增一个新的变量名。
set(METAL_FRAMEWORKS
    "-framework Foundation"
    "-framework CoreGraphics"
    "-framework ImageIO"
    "-framework QuartzCore"
    "-framework Metal")
shader 编译步骤保持为 .metal -> .air -> .metallib:
最后仍然在 CMakeLists.txt 中新增 Book2 的 shader 编译命令。它是在 target 定义之后继续追加的构建步骤,不是替换前面的 add_executable。
set(BOOK2_DIR "${CMAKE_BINARY_DIR}/MetalCppTinyRenderer")
set(BOOK2_METALLIB "${BOOK2_DIR}/default.metallib")
add_custom_command(
    OUTPUT "${BOOK2_METALLIB}"
    COMMAND "${CMAKE_COMMAND}" -E make_directory "${BOOK2_DIR}/ModuleCache"
    COMMAND xcrun -sdk macosx metal
            "-fmodules-cache-path=${BOOK2_DIR}/ModuleCache"
            -c "${CMAKE_CURRENT_SOURCE_DIR}/src/MetalCppTinyRenderer/Shaders.metal"
            -o "${BOOK2_DIR}/Shaders.air"
    COMMAND xcrun -sdk macosx metallib
            "${BOOK2_DIR}/Shaders.air"
            -o "${BOOK2_METALLIB}"
    DEPENDS src/MetalCppTinyRenderer/Shaders.metal)
Reference Code
最终参考代码目录是 src/MetalCppTinyRenderer/。如果你想核对最终实现,可以对照下面的文件清单:
下面同样是目录清单,不是要粘贴进源码的代码块。
src/MetalCppTinyRenderer/
  main.cpp
  Renderer.cpp
  Shaders.metal
assets/
  meshes/uv_sphere.obj
  meshes/stanford_bunny.obj
  textures/warm_metal.ppm
  textures/clay.ppm
  textures/rusty_metal_02_basecolor.png
  textures/rusty_metal_02_roughness.png
  textures/rusty_metal_02_metallic.png
  textures/rusty_metal_02_normal.png
  textures/rusty_metal_02_ao.png
textures/README.mdmain.cpp:对应 `Mesh and Texture Input` 和 `Reference Code`,负责解析 mesh、texture、stage、output path。Renderer.cpp:对应 `Device and Command Queue`、`Offscreen Render Target`、`Camera and Framing`、`Render Pass and Readback`,负责资源创建、draw call 和图片输出。Shaders.metal:对应 `Vertex Shader`、`Texture Sampling`、`Rendering Progression`,包含vertex_main和四个 fragment stage。
预期输出:
uv_sphere.obj可以生成 `albedo`、`lambert`、`blinn`、`pbr` 四张结果图。rusty_metal_02_basecolor.png配合同目录下的 roughness、metallic、normal、AO 贴图,可以生成一组真实 PBR 材质结果图。stanford_bunny.obj可以生成 `lambert` 和 `blinn` 两张结果图。- 输出文件格式支持
P6 PPM、PNG和JPG。
最后这段仍然是运行命令,用来验证你已经完成了整本书的最终版本。
cmake -S . -B build
cmake --build build --target MetalCppTinyRenderer

./build/MetalCppTinyRenderer/MetalCppTinyRenderer \
  assets/meshes/uv_sphere.obj \
  assets/textures/rusty_metal_02_basecolor.png \
  pbr \
  build/MetalCppTinyRenderer/09-rusty-metal-pbr.png